48V UTILITY VEHICLE INSTALLATION SERIES
Put your Carryall to work with less battery upkeep. Plan a Fleet Lithium conversion around your actual vehicle—from legacy PowerDrive models to later Turf and LSV configurations—with a clear installation sequence and a printable manual.
Can a Club Car Carryall be converted to lithium?
Yes. Compatible 48V lead-acid electric Carryalls can use a matched Fleet 51.2V lithium conversion kit. Replace the complete old battery bank with the correct battery, restraint, lithium charger, charging interface and SOC gauge. The key differences are the controller, PowerDrive/OBC versus ERIC or QuiQ charging, and the power supply for accessories and the cargo bed.
Match the electrical system, not just the Carryall badge
Start with photographs of the serial label, controller, charger, complete battery bank and accessory connections. Model year alone does not identify the correct charging or control interface.
| Carryall family | Installation details to identify |
|---|---|
| Legacy I / II / VI and later 1 / 2 / 6 | PowerDrive examples use six 8V batteries and an OBC; documented later IQ Plus Carryall 2/6 use eight 6V batteries. Series and regenerative-drive controls differ. |
| 300 / 300 Turf | Documented 48V lead-acid models use six 8V batteries. ERIC charging differs from the older OBC system. |
| 500 / 502 / 550 / 700, including Turf | Documented lead-acid configurations use eight 6V batteries and an onboard charger. Distinguish DC drive, HP AC drive and factory lithium. |
| 510 / 710 LSV | Match the actual 48V lead-acid AC-drive system and preserve lighting, warning equipment, charging controls and intended braking. |
| 100 or another configuration | Confirm the serial label, original bank and controller with Fleet. Do not infer hardware from another Carryall. |
This guide is for matched 48V lead-acid conversions. Gas, diesel, 36V/72V and factory lithium vehicles—including Vanguard-equipped versions—require different equipment and procedures.
Choose the battery reserve your work needs
A lithium conversion removes the lead-acid watering and equalization routine. Choose capacity for the route, grades, cargo, towing and accessories you actually use, then check the physical fit. A dedicated Fleet SOC gauge gives you a display matched to your new battery.
| Fleet option | Nominal energy | Best planning use |
|---|---|---|
| 65Ah | 3.33 kWh | Approved stock motor/controller and load only. |
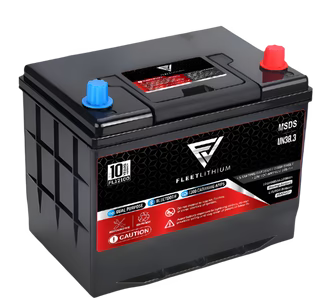
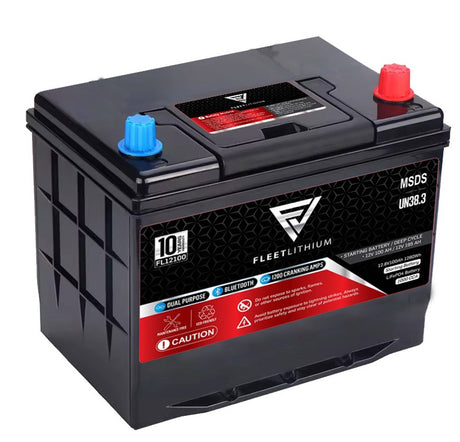
| 105Ah | 5.38 kWh | A compact starting point for everyday work. |
| 168Ah | 8.60 kWh | More reserve; confirm the larger case and restraint. |
| 210Ah: two 105Ah packs | 10.75 kWh | Longest reserve here; approved parallel harness and independent restraints. |
Energy is nominal voltage × amp-hours. It is not a driving-range promise. Payload, terrain, tires, speed and temperature affect consumption. The original payload, tow and controller limits still apply.
The Carryall lithium installation sequence
Read the illustrated manual before scheduling the work. Allow time for safe battery handling, tray repair if needed, mounting, charging controls, gauge fitting and commissioning.
1. Secure the vehicle and support the cargo bed
Park level, unload the bed, select Neutral, set the parking brake, remove the key, chock the wheels and unplug AC. If access requires raising the bed, engage the correct prop rod or service support. Never rely on the lift actuator alone.
2. Label and isolate the complete old bank
Photograph and label complete-pack positive and negative, protection devices, charger, OBC if present, reducer and bed-lift feeds. Identify every small wire and any tap from an individual battery. Set Tow/Run to TOW where fitted and follow the exact vehicle isolation procedure. Disconnect complete-pack negative first, then positive; insulate the ends. The documented 500/550/700 procedure requires 90 seconds for controller discharge.
Use insulated tools and appropriate lifting equipment. Keep lead-acid batteries upright, remove the series links and hold-downs, and recycle the old bank. Inspect and repair the tray and cables before installing the new system.
3. Trial fit the correct restraint
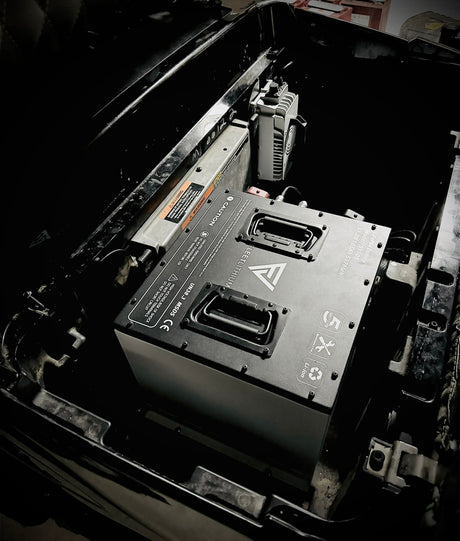
Keep the Fleet battery OFF. Use BR1165 only where specified for your tray and capacity; Carryall 2 and other models can use different mounting hardware. Check clearance under the seat and through the cargo bed’s full movement. Stay clear of hinges, prop rods, lift linkages and sharp edges. The secured battery must not slide, rock or lift.
4. Connect the identified vehicle power cables
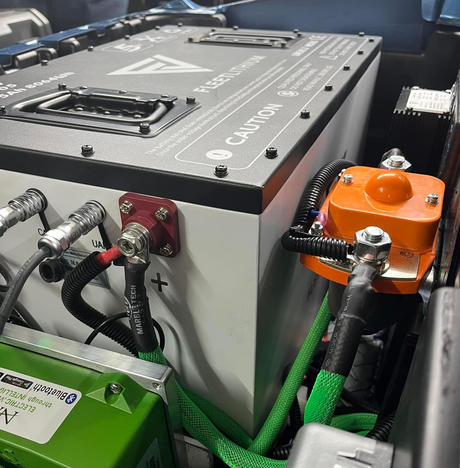
Retain the specified protection and original traction return. The frame is not a substitute battery-negative cable. With the pack OFF, follow the battery waiting period, verify polarity, connect positive first and negative last using the matched cable and hardware order. Apply the actual Fleet terminal torque and fit insulating covers. The old lead-acid terminal torque is not the Fleet specification.
5. Install the lithium charger and the correct control interface
The general Carryall bundle lists CH5618: 58.4V / 18A and the AC0219 inlet. Its charging path is grounded AC supply → inlet → lithium charger → battery. Mount the charger securely with ventilation, protect the pigtail and route cables away from cargo-bed movement. Confirm your order: some model-specific kits use another matched interface.
PowerDrive/OBC, ERIC and onboard QuiQ are different systems. Use the exact matched control harness or documented vehicle-specific procedure. Retire the lead-acid charging program. Do not apply a universal wire-color bypass, bridge unidentified wires or assume the AC inlet alone provides a drive interlock. Preserve and test the vehicle’s correct charge-inhibit arrangement.
6. Choose either gauge-mount option
Flush dash: confirm the gauge body and clamp dimensions, inspect behind the panel, then use a 2-inch (50.8 mm) hole saw for a verified 2-inch cutout. Remove burrs and secure the gauge without crushing the dash.
Included mount: fit the gauge in the supplied 2-inch mount at a visible position clear of controls, knees and bed operation. Check behind every mounting screw. For either option, route the matched gauge cable to the designated Fleet battery display port. Do not reuse unidentified old gauge wires.
Keep lights, accessories and the cargo bed working correctly
Identify each load’s rated voltage before reconnecting it. Some bed actuators use full-pack voltage; many lights and accessories use 12V. Read the component label and trace the circuit instead of assuming every bed lift is 12V.
A 12V load formerly tapped from one lead-acid battery needs a correctly rated supply. The converter must accept the 58.4V full-charge voltage and support the actual load, including starting or stall demand. Preserve its enable circuit and protection. The general Carryall kit does not list a reducer; check your order and existing equipment.
Keep the bed supported during wiring. Route sufficient cable travel for the full lift/lower movement. A standard accessory reducer is not automatically suitable for a winch or high-current actuator.
Installing 210Ah? Keep the two packs in parallel
Use two approved matching 105Ah batteries, each properly restrained. Follow Fleet’s voltage/SOC matching and parallel-harness instructions before joining outputs. Positive connects to positive and negative to negative; the system remains 51.2V nominal. Never connect these packs in series. Confirm both charge and contribute during testing.
First charge and commissioning
Before power-up, verify polarity, restraint, torque, covers, protection, gauge, accessory supply and charging interface. Follow the correct startup/precharge sequence. Check every pack’s SOC, voltage and faults. On documented ERIC Carryall 300 vehicles, wait 10 seconds after returning Tow/Run to RUN before operation.
Complete a normal lithium charge. With an 18A charger, ideal Ah ÷ A estimates are 3.6 / 5.8 / 9.3 / 11.7 hours for 65 / 105 / 168 / 210Ah; actual charging takes longer with tapering, balancing, temperature effects and active loads.
Verify the installed charging inhibit using the correct service procedure. Disconnect and stow AC before a walking-speed test on clear, level ground. Test forward/reverse, steering, brakes, lights and the unloaded bed lift, then reinspect for movement, cable rubbing or heat. A full pack has less headroom for regenerative energy: do not make a steep downhill run your first test or change BMS limits to mask a fault.
KEEP WITH YOUR CARRYALL
Your illustrated installation manual
Original diagrams, model differences, both gauge mounts, charging-system guidance, bed-lift wiring considerations, troubleshooting and a fillable owner record.
Revision 1.0 · 10 pages · printable and fillable PDF
Club Car Carryall lithium conversion FAQs
Can I convert my Club Car Carryall to lithium?
Compatible 48V electric lead-acid Carryalls can use a matched Fleet 51.2V nominal lithium kit. Confirm the serial number, controller, original charging system, tray and accessories. This guide does not cover gas, diesel, 36V/72V vehicles or factory lithium configurations.
Does every Carryall have the same lead-acid battery bank?
No. Documented PowerDrive and Carryall 300 examples use six 8V batteries; later IQ Plus Carryall 2/6 and documented 500/502/550/700 lead-acid models use eight 6V batteries. Both arrangements total 48V. Identify your actual bank before labeling complete-pack positive and negative.
Which Fleet battery capacity should I choose?
65Ah is for an approved stock motor/controller and load. 105Ah offers 5.38 kWh nominal energy, 168Ah offers 8.60 kWh, and 210Ah uses two matched 105Ah packs in parallel for 10.75 kWh. Choose reserve for your work, then verify case dimensions, restraint and cargo-bed clearance. More capacity does not raise the vehicle payload or towing rating.
Do Carryall PowerDrive, ERIC and QuiQ use the same wiring?
No. Legacy PowerDrive vehicles may have an onboard computer (OBC); ERIC and onboard QuiQ arrangements have different charging controls. Use the matched lithium charger and the correct vehicle control interface. Do not copy a universal wire-color bypass or assume an AC inlet alone provides a drive interlock.
What charger and charge inlet does the Fleet Carryall kit use?
The general Carryall bundle lists CH5618, a 58.4V 18A lithium charger, and AC0219 AC inlet. Some model-specific orders use a different matched charging interface. Check the supplied equipment and order details; retire the old lead-acid charge program.
Can I power the lights and electric cargo bed from the lithium battery?
First identify the rated voltage of every component. Some bed actuators use full-pack voltage, while many accessories use 12V. A 12V circuit needs a correctly rated supply that accepts 58.4V full-charge input and supports starting or stall demand. Never connect a 12V load directly to the traction pack. A reducer is not listed in the general Carryall kit.
How do I mount the Fleet battery gauge?
Use a verified 2-inch (50.8 mm) dash cutout, made with a 2-inch hole saw after checking behind the panel, or use the included 2-inch gauge mount. Verify the gauge body and clamp fit first. Route its matched cable to the designated battery display port; do not reuse unidentified old gauge wires.
Does one bracket fit every Carryall?
No. Use BR1165 only where specified for the actual tray and capacity; Carryall 2 and other configurations can require different hardware. Each pack in a 210Ah installation needs its own restraint. Check the full movement of the cargo bed and the space under the seat before connecting power.
How long will charging take with the 18A charger?
Ideal empty-to-full calculations are about 3.6 hours for 65Ah, 5.8 hours for 105Ah, 9.3 hours for 168Ah and 11.7 hours for 210Ah total. These are Ah divided by 18A, not guaranteed times. Tapering, balancing, temperature and active loads extend charging.
Where can I download the Carryall installation manual?
The Fleet Lithium Carryall installation manual is available below and in the product downloads library. Revision 1.0 includes original diagrams, model differences, both gauge mounts, charging controls, bed-lift guidance, troubleshooting and a fillable installation record.
Build the right Fleet system for your Carryall
Choose your reserve and match the complete installation to your vehicle. Send Fleet your serial label, controller and battery-tray photos for help selecting the correct kit.