A Hauler earns its place by getting work done. If your days now include checking water levels, nursing tired lead-acid batteries or cutting a route short to recharge, a lithium conversion is worth a closer look.
The quick answer
Can a 72V Cushman Hauler PRO or PRO-X run on lithium?
Yes—factory 72V lead-acid models are the application for Fleet’s 76.8V Cushman conversion kit. The conversion replaces nine 8V batteries with one LiFePO4 battery and a matched 87.6V lithium charger. Before ordering, identify the mounting space, accessory power supply and charger interlock on your particular Hauler.
Less battery upkeep. More time using your Hauler.
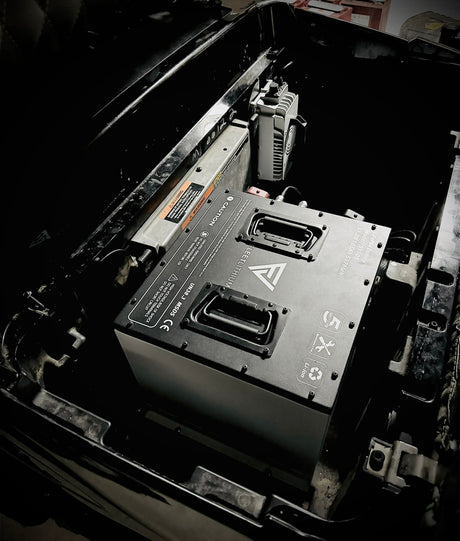
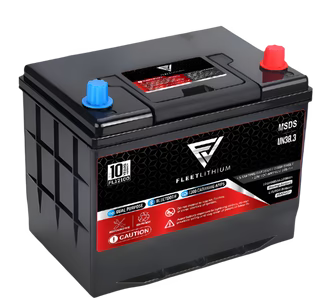
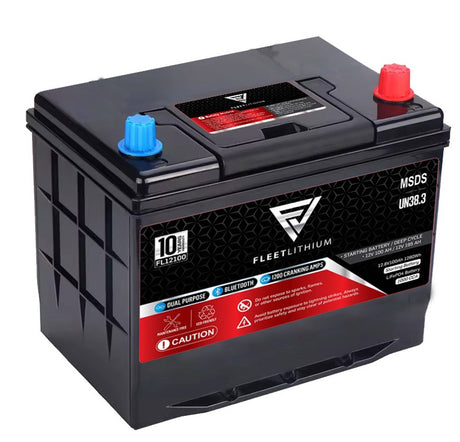
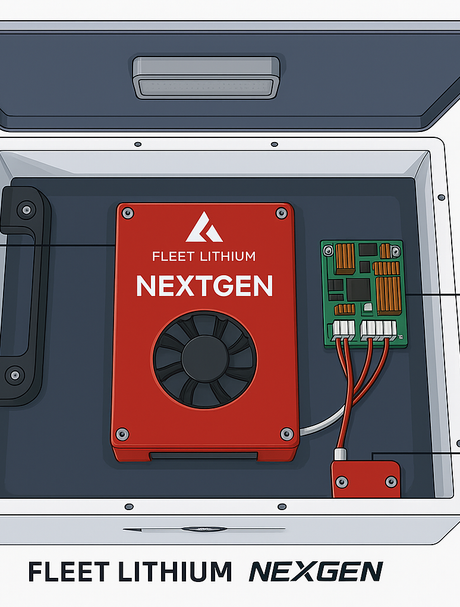
One Fleet Lithium battery replaces the old lead-acid bank and its watering routine. The current NexGen battery includes a 300A continuous / 800A peak battery management system, Bluetooth monitoring, automatic heating and built-in fire suppression. A digital state-of-charge gauge makes it easier to see how much charge you have left.
You still inspect the mounting hardware and wiring, and you still follow Cushman’s payload, towing and operating limits. The upgrade simplifies battery ownership without changing what the vehicle is rated to do.
10-Year Warranty
Power you can Trust
Choose the capacity that fits your work, with Fleet Lithium support behind your battery.
View warranty details and registrationStart with the battery system, not just the Hauler badge
This guide covers factory 72V lead-acid Hauler PRO and PRO-X vehicles. It does not cover factory ELiTE lithium models, gasoline vehicles or 48V Haulers. Check the identification plate and original electrical configuration; a similar body or model name is not enough to confirm the kit.
The legacy bank uses nine 8V batteries in series. Photograph the bank, its end-terminal connections and every small wire before disconnecting it. On a working vehicle, also check the lights, horn and electric bed lift so you have a useful before-and-after comparison.

105Ah or 168Ah: choose energy for your workload
| Capacity | Nominal energy | What to consider |
|---|---|---|
| 105Ah | 8.06 kWh | Check this option against your normal work route and charging opportunities, then confirm the case and matching restraint fit. |
| 168Ah | 12.90 kWh | 60% more nominal stored energy. Confirm the larger case, its mounting arrangement and clearance under the bed and seat. |
More amp-hours give you more stored energy at the same nominal voltage. They do not create a guaranteed mileage figure: a loaded utility vehicle on hills uses energy differently from an empty Hauler on level pavement.
Compare the current Cushman kit options before choosing your capacity.
Connect the charger, accessory supply and interlock bypass
Before removing the original charger, identify the jobs it performs. Some 72V Haulers use a Delta-Q QuiQ-dci that combines battery charging with a lower-voltage accessory supply. The charger harness also carries the signal that stops the Hauler from driving while plugged in.
Keep a suitable factory voltage reducer
You do not need a second reducer when the original supply is suitable. The documented 72V QuiQ-dci converter accepts 50–130V DC and supplies 13.5V ± 0.7V, with 30A continuous and 60A peak capacity. That input range covers the Fleet battery’s 87.6V charging voltage. Confirm the actual unit and accessory load before retaining it.
Keep its protected DC input, enable wiring and accessory connectors. Disconnect, secure and label the old AC charging input; use the new Fleet lithium charger. If the original supply is absent, damaged or unsuitable, include a replacement reducer rated for the battery’s full operating range and your accessory loads. Accessory return wires belong at the reducer’s output negative, not at the battery negative or vehicle frame.
Bypass the original charger interlock
Fleet’s conversion bypasses the original charger interlock. With AC unplugged, key OFF, RUN/TOW in TOW and the battery isolated, identify the vehicle-side harness shown on page 9 of the manual. On the original harness used from 22 March 2015, disconnect the old charger’s two gray leads and mate vehicle-side PUSH ON37 (male) to PUSH ON50 (female). Fully insulate, tug-check and secure the joined pair; retain the original circuit fuse.
Earlier original harnesses use a different three-way connector arrangement. Match the illustrated OEM connection before joining anything; do not apply the later connector labels to an earlier or modified harness. Do not bridge unidentified wires or use CH8713 indicator leads as interlock wires. After this bypass, the Hauler can move with AC connected. Fit the UNPLUG BEFORE DRIVING reminder at the inlet and dashboard, and unplug the charging cord before every drive.
Give the bed lift the supply it needs
Check the lift motor or actuator’s voltage and startup current. A lighting reducer may not be large enough to start it. Preserve the required fuse and switching circuit, and do not reuse a connection taken from part of the old lead-acid bank. Keep the bed mechanically supported while wiring; test its full travel after power is restored.
What the conversion involves
The illustrated installation manual takes you through the sequence, wiring overview and owner checks. Use it alongside the component instructions supplied with your exact kit and the Cushman manual for your vehicle.
- Photograph and label the original wiring. Identify the main battery feeds, accessory supply, charger-lockout connections and bed-lift circuit. Measure the real cable route, including bends and slack.
- Park and isolate. Empty the bed, park on level ground, set the brake and chock the wheels. Support a raised bed mechanically. Unplug AC, remove the key and select TOW before disconnecting the old bank’s negative feed, then positive.
- Remove the old bank and restore the supports. Remove the series links and hold-downs, lift the batteries out safely, then clean and repair the original racks.
- Mount the Fleet battery at its base. The 168Ah installation uses the same Fleet bracket as the Bad Boy Recoil / Textron 72V 168Ah kit. Trial-fit the bracket on sound rack supports, check battery orientation and clearance, then fasten the bracket and battery through their designated mounting points using the supplied hardware. The battery’s slotted base flanges secure the case; lid screws are not mounting points. Confirm that the case cannot slide, lift or rock. Match the 105Ah case to its own restraint.
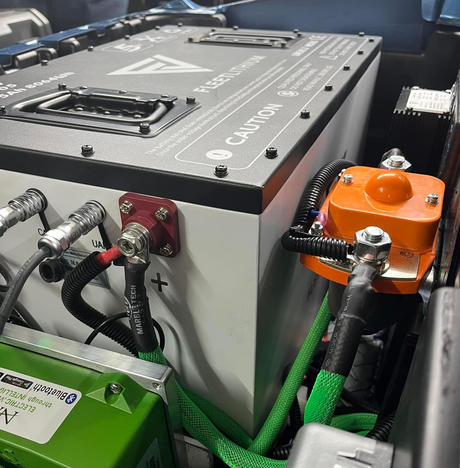
- Route all wiring before connecting the battery. Prepare the main cables, CH8713 lithium charger, original charger-interlock bypass and suitable accessory supply. Leave battery-end lugs disconnected and covered until wiring is complete. Connect the matching gauge harness to DISPLAY, not COM. The manual identifies the real battery ports and shows each connection.
- Make the final positive-then-negative connections. With AC unplugged, key OFF, RUN/TOW in TOW and battery OFF, connect the identified positive feeds first, then negative feeds. Seat lugs flat with the supplied hardware and tighten securely with hand tools. Avoid impact tools and continued forcing after seating. Fit terminal covers before switching on.
Measure the cable route—not the straight-line distance
The current kit lists CB0917 cables at 35.4 inches (900 mm). Bed hinges, the controller location and terminal orientation affect the real route. If the cables cannot reach with proper bends and slack, use correctly sized replacements. Do not strain the battery terminals or add improvised extensions.
This is high-current electrical work around a heavy battery and a moving cargo bed. If you cannot safely identify and isolate the circuits, use a qualified vehicle electrician. The manual explains what to check so you can keep a clear record of the finished installation.
Check the finished installation before returning to work
Switch the battery on and check the Fleet display or app. If you installed a new reducer, measure its output with accessory loads disconnected, then switch off and isolate the circuit before connecting those loads. Wait at least 30 seconds after reconnecting wiring before moving RUN/TOW to RUN.
Complete a normal charge through the new lithium inlet, with the vehicle parked, chocked and key removed. The original charger interlock is bypassed: do not rely on it to prevent driving with the cord connected. Disconnect AC and stow the cord before selecting RUN or checking vehicle movement. Confirm that the UNPLUG BEFORE DRIVING labels are visible at the inlet and dashboard.
Check the lights, horn and empty bed lift. Confirm that the bed moves freely without contacting the case or pinching wires. Start with a short, level-ground drive and check forward, reverse and both brakes. Afterward, park and chock the vehicle, turn the key off and inspect for loose cables or abnormal connection heat. Isolate the electrical system before adjusting a connection. Keep the completed installation record with your wiring photos.
Cushman Hauler lithium conversion FAQs
Can I convert a Cushman Hauler PRO or PRO-X to lithium?
Factory 72V lead-acid Hauler PRO and PRO-X vehicles are the application covered by this guide. Match the Fleet 76.8V kit to your actual battery bay, mounting arrangement, charger interlock and accessory supply. Factory ELiTE lithium, 48V and gasoline models are outside this guide.
How many lead-acid batteries does the 72V Hauler use?
The factory 72V lead-acid configuration covered here uses nine 8V batteries connected in series. The Fleet conversion replaces that bank with one 76.8V LiFePO4 battery. Photograph your original wiring before removal.
Why does the lithium battery say 76.8V if my Hauler is 72V?
72V is the original vehicle battery-system designation. The Fleet lithium replacement has a nominal voltage of 76.8V and uses a matched charger with an 87.6V output. Verify voltage ratings for every retained charger, converter and accessory supply.
Do I need a new voltage reducer?
A compatible reducer is required when the original lower-voltage accessory supply cannot remain in service. A separate replacement is optional when a suitable factory converter is retained. Its documented input range must cover the lithium battery range, including 87.6V at full charge, and its output must suit the accessories.
Can I keep the original Delta-Q charger?
Use the matched Fleet lithium charger for charging. A suitable original 72V QuiQ-dci may remain as the accessory converter with its old AC input disconnected, secured and labeled. Its documented converter input is 50–130V DC. Fleet’s conversion bypasses the original charger interlock; always unplug AC before driving.
Why will my Hauler not drive after the batteries are replaced?
Check that AC is unplugged, RUN/TOW is in RUN, the start sequence is correct and the battery shows no fault. Removing the original charger opens the original drive-enable circuit unless the correct vehicle-side interlock bypass is completed. Follow page 9 for the matching original harness. Check required control power and fuses; do not join unidentified wires.
Should I choose 105Ah or 168Ah?
The 105Ah battery stores 8.06 kWh nominally; the 168Ah stores 12.90 kWh, or 60% more nominal energy. Choose after checking your workload, charging opportunities and the space and restraint required by each case. Actual range varies with load, terrain, temperature, tires and driving.
Will the electric dump bed still work?
It can remain functional when supplied at its required voltage and startup current. Identify the lift motor or actuator rating before converting. Do not assume the lift is 12V, that a lighting reducer can power it, or that an old partial-bank battery tap can be reused.
What if the battery cables are too short?
Measure the protected route before installation. The listed CB0917 set is 35.4 inches (900 mm). If it does not reach with proper bends and slack, use correctly sized replacement cables and lugs for the route and current. Do not pull terminals sideways or add improvised extensions.
What warranty comes with the Fleet Lithium battery?
Your Fleet Lithium EV battery is backed by a 10-Year Warranty. Power you can Trust. See the Fleet Lithium warranty page for terms and registration information. Warranty details.
Ready to give your Hauler a fresh start?
Choose your Fleet Lithium capacity and line up the installation details before the old bank comes out. Start with your vehicle serial number and photos of the charger, battery bay and bed-lift label.
Battery warranty: 10-Year Warranty. Power you can Trust. This guide covers the factory 72V lead-acid configuration; confirm your actual vehicle and supplied components before installation.