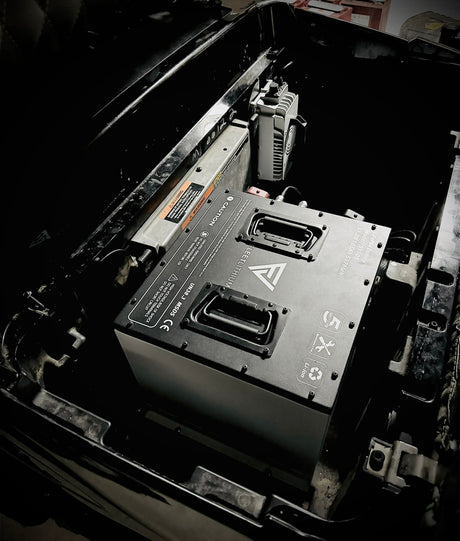
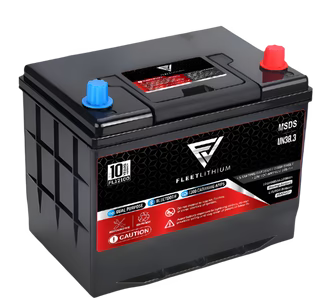
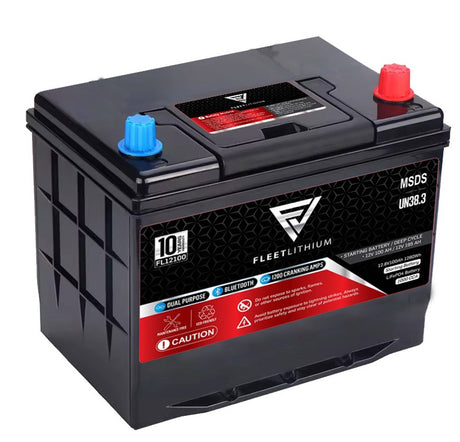
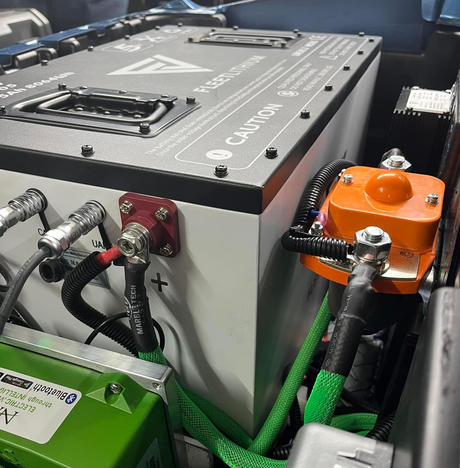
Can you convert an ICON golf cart to lithium?
Yes. A compatible 48V lead-acid ICON i20, i40, i60 or i80 can be converted with a matched Fleet Lithium 51.2V battery system, ICON mounting kit, lithium charger and SOC display. Identify your actual battery tray and controller first: the charger interlock and dashboard connections can differ across ICON builds.
Whether your ICON handles neighborhood trips, family outings or regular passenger runs, the right conversion starts with the way you use it. This guide helps you compare capacity, recognize the original equipment and plan the installation. The downloadable manual takes you through removal, mounting, wiring, charging and the first drive with real ICON photos and an installation record.
Start with your ICON’s actual battery system
This guide covers confirmed compatible 48V lead-acid i20, i40, i60 and i80 carts. Lifted variants use these checks when their mounting and electrical application are confirmed. A model name, year or seat count does not establish the tray, controller or voltage. Factory-lithium replacements need a separate harness, communication and charging compatibility check.
Photograph the model/serial plate, controller label, entire battery bank, charger, converter and dashboard. Read the voltage on every original battery. Six 8V batteries or eight 6V batteries in series both make a 48V bank. A Fleet 51V replacement is a 51.2V nominal lithium configuration for the compatible 48V application; a 76.8V pack is not a replacement for a 48V ICON system.
Real ICON lead-acid battery layouts


ICON i60: count the complete bank

The i60 photograph shows why the complete bay matters. Count every battery and trace the two endpoints of the series string before removal. For an i80 or a different tray revision, inspect every battery-access area and measure the actual mounting space. The example photographs establish what is shown, not a universal layout for every model year.
Why choose Fleet Lithium for your ICON?
- Choose useful energy capacity. Match the system to daily distance, hills, passenger load and available charging time.
- Get battery information you can use. The matching SOC display and supported battery monitoring help you understand the lithium system.
- Plan a coordinated conversion. Select the battery, mounting, charger and electrical interface together.
- Get fitment help before the cart is apart. Fleet can review your labels and tray photos against your intended configuration.
If your current ICON has sealed AGM batteries, it already needs no watering. Lithium selection is about capacity, monitoring and a suitable battery system; secure mounts, protected terminals and correct charging remain part of ownership. See the current Fleet warranty terms for your chosen battery.
Which ICON lithium capacity should you choose?
| Capacity | Arrangement | Nominal energy | Selection guidance |
|---|---|---|---|
| 65Ah | One pack | 3.33 kWh | Stock motor/controller and approved load |
| 105Ah | One pack | 5.38 kWh | Everyday trips with opportunities to recharge |
| 168Ah | One pack | 8.60 kWh | More reserve in a single pack |
| 210Ah | Two matched 105Ah packs in parallel | 10.75 kWh | More energy with approved dual mounting and wiring |
Energy is calculated as 51.2V × Ah ÷ 1,000; it is not a guaranteed usable-energy or mileage figure. An i60 or i80 carrying passengers can demand more energy than a lightly loaded i20. Speed, terrain, tires, temperature and accessories also affect range. Choose reserve for the return trip, and have the battery’s current capability checked against your actual controller and load.
Compare the current ICON conversion kits and prices →
Toyota NEOS and ICON controllers: identify yours first
Earlier ICON builds can use Toyota NEOS or ICON/LVTong controller equipment. Read the actual controller label. On documented earlier harnesses, the four-cavity diagnostic connector can help: three populated contacts points toward NEOS, while four points toward ICON equipment. Confirm the label before ordering an interface.
The vehicle diagnostic plug is not the Fleet SOC-display connection. Similar connector shapes do not establish compatibility. Controller version affects interface selection, voltage limits and regenerative-braking configuration. Avoid a blanket assumption that every ICON needs programming—or that none do.
ICON lithium installation: the sequence
The 48V Fleet listing includes your selected battery configuration, BR5126 ICON bracket kit, CH5618 58.4V/18A charger, AC0219 AC connector, CB0917 35.4-inch cable set, digital SOC gauge and mounting hardware. Verify the delivered packing list and have the matching ICON charge-inhibit interface and fitting instructions before removal.
- Secure and isolate. Chock the wheels, unplug AC and turn the key OFF. Use center OFF on the RUN/OFF/MANUAL EMB service control. Where a TOW/RUN control is fitted, use the vehicle’s specified service position. MANUAL EMB releases the parking brake.
- Label before disconnecting. Photograph the complete bank. Tag MAIN +, MAIN −, charger, converter and small fused control feeds. Disconnect and insulate main negative first, then main positive.
- Remove the old bank and inspect the tray. Remove its crossbar and obsolete series links. Retain the controller, converter, brake wiring and main vehicle circuits. Repair corrosion or cable damage.
- Trial-fit BR5126 and secure the new battery. Check raised bosses, under-seat controls and electrical equipment. Confirm seat clearance and use the supplied fitting arrangement and torque specifications.
- Reconnect the correct circuits. Keep 12V accessories on the converter output. With the pack OFF, connect verified positive circuits first and negative last. Cover the terminals and protect cable routes.
- Install charging and battery monitoring. Use the matched charger, AC connector, charge-inhibit interface and Fleet SOC display. Keep the original dash connected for vehicle functions.
- Commission before normal use. Verify controls, accessories, charging and drive inhibition. Complete a full charge, test at walking speed, check service and parking brakes, then reinspect the installation.
The supplied component instructions provide the fitting details and pin assignments for your delivered hardware. Never substitute another battery brand’s bracket cutting pattern, CAN harness or programming values. If the electrical work is beyond your experience, use a service provider familiar with your ICON controller and the Fleet kit.
The 210Ah option is parallel, not series
Two matched 51.2V 105Ah packs provide 210Ah when connected with the approved parallel system: positive to positive and negative to negative. Voltage remains 51.2V nominal. Use Fleet’s pack-matching procedure, dual mounts, cables and protection, and check that both packs participate in charging and driving. Recreating the old lead-acid series connection would double the voltage.
The charger interlock and dashboard deserve their own check


Dash on, but no drive?
The original charger has a small control connection separate from its high-current charging output. The replacement must preserve the vehicle’s charge-drive interlock. If lights and dash work but the cart will not move, first confirm AC is disconnected, RUN is selected and the accelerator was released at key-on. Then inspect the interlock interface, controller faults and brake wiring. Do not bypass the interlock.
Can the original 12V converter stay?
Retain it when its full input range covers the new battery system through the CH5618 charger’s 58.4V output, and its condition, output, load and enable wiring are suitable. Lights, USB, horn, camera and audio remain on its output. Never connect 12V accessory wires directly to battery positive.
Which battery reading should you trust?
Use the matching Fleet SOC display or supported battery app. The original lead-acid percentage estimate and body charging LED do not automatically become compatible by changing the battery. Read charging status from the matched charger’s indicator legend.
Keep the instructions beside your ICON
Download the combined ICON installation manual
The 10-page manual covers i20, i40, i60 and i80 application checks, real before photos, 19 installation and commissioning steps, an original parallel-system drawing, ICON troubleshooting and a fillable installation record.
FL-IM-ICON-48 • Revision 1.0 • October 9, 2026 • Compatible 48V lead-acid conversions.
ICON lithium conversion questions
Can I convert an ICON i20, i40, i60 or i80 to lithium?
Yes, a confirmed compatible 48V lead-acid ICON can use the matched Fleet 51.2V nominal lithium system. Check the actual tray, controller, converter and charger interface. Factory-lithium replacements and higher-voltage conversions need separate instructions.
Why is a 51V battery sold for a 48V ICON?
51V is the Fleet product name for a 51.2V nominal LiFePO4 system offered for compatible 48V vehicles. Its matched CH5618 charger is rated 58.4V DC and 18A. Confirm the full operating range of your vehicle components; a 76.8V pack is not interchangeable.
How many batteries are in an ICON golf cart?
Older 48V lead-acid banks can use six 8V or eight 6V batteries in series. The i60 photographed in this guide has eight flooded batteries in one tray. Read every battery label and inspect the complete bank; seating capacity does not establish the battery arrangement.
Does my ICON have a Toyota NEOS or ICON controller?
Read the controller label and model/serial plate. On documented earlier harnesses, a four-cavity diagnostic connector with three populated contacts points toward NEOS; four populated contacts points toward ICON equipment. Confirm the label before selecting an interface. The diagnostic plug is not the Fleet display port.
Can I keep my original ICON charger?
Use the lithium charger matched to the Fleet battery. The 48V ICON bundle lists CH5618, rated 58.4V DC and 18A. Keep the AC inlet, DC output, drive-inhibit and charge-status wiring separately identified, and preserve the charge-drive interlock through the matched interface.
Why does my ICON dashboard power up but the cart will not drive after conversion?
With AC disconnected, check RUN is selected, the accelerator was released at key-on and a direction is selected. Inspect the original charger-inhibit connector and matched replacement interface, then controller faults and brake wiring. Do not bridge or disable the interlock.
Will the original ICON dashboard show the right lithium battery percentage?
Do not assume its lead-acid percentage estimate or body charge LED will become accurate. Keep the ICON dashboard for vehicle functions and use the matched Fleet SOC display or supported battery app for battery information.
Is the 210Ah ICON kit a single battery?
It uses two matched 51.2V 105Ah packs connected in parallel with the approved dual mounting, wiring, protection and pack-matching procedure. Total capacity is 210Ah while nominal voltage stays 51.2V. Never connect the packs in series.
Does an ICON lithium conversion always need controller programming?
There is no universal answer by model name or year. Confirm the controller version, voltage limits, battery current demand and regenerative-braking configuration for the selected Fleet pack and interface. Do not copy another battery brand's programming values.
Can I retain the ICON 12V converter?
Yes, when its complete input range accepts the Fleet system through 58.4V and its condition, output, load capacity and enable wiring are suitable. Keep accessories on its output. Never connect 12V wiring directly to the lithium battery positive terminal.
Build the right Fleet system for your ICON
Start with your model/serial plate, controller label, full battery-bay photos and normal driving needs. We can help match the capacity and installation components to your cart before you order.