Upgrading your golf cart with a lithium battery is one of the smartest decisions you can make for improving both the performance and longevity of your vehicle. Lithium batteries offer a wealth of advantages over traditional lead-acid batteries, including faster charging, longer lifespan, lighter weight, and more consistent power delivery. In this comprehensive, step-by-step guide, we will walk you through how to install a Fleet Lithium Golf Cart Battery and get the most out of your golf cart.
Step 1: Choose the Right Battery
The first and most important step in upgrading your golf cart is selecting the correct lithium battery. Fleet Lithium offers high-quality 36V, 48V, and 72V lithium batteries designed for a wide range of golf cart applications. The voltage of the battery you choose must match your cart's existing system to ensure optimal performance.
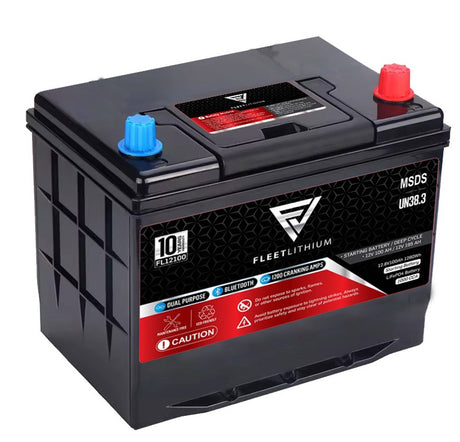
- Fleet Lithium 51V 105Ah Battery: This battery is an excellent choice for those seeking more power and longer runtime for their golf carts. With its 51V configuration and 105Ah capacity, it delivers outstanding performance for extended runs and quick charging. You can find it here.
When choosing your battery, make sure to check your golf cart's voltage and capacity requirements to avoid compatibility issues.
Step 2: Gather the Necessary Tools
Before diving into the installation, ensure you have all the necessary tools on hand to make the process as smooth and efficient as possible. Here's a list of the tools you'll need:
- Socket Wrench Set: For removing and installing battery terminals.
- Voltage Tester: To check the voltage after installation and ensure everything is working correctly.
- Wrenches: For removing the cables and adjusting the connections.
- Battery Terminal Cleaner: To clean any corrosion from the battery terminals.
- Safety Gloves and Glasses: To protect yourself from potential sparks or acid exposure.
Having the right tools at hand will ensure a quick and safe installation process.
Step 3: Disconnect the Existing Battery
Before installing the lithium battery, the old lead-acid battery needs to be disconnected. Follow these steps to safely remove the existing battery:
- Turn off the Golf Cart: Make sure the cart is turned off before starting the disconnection process.
- Disconnect the Negative Terminal: Begin by removing the negative terminal from the existing lead-acid battery. This step is crucial for safety.
- Disconnect the Positive Terminal: Next, remove the positive terminal. Make sure to keep the cables away from the battery terminals to prevent any accidental contact.
- Remove the Battery: After the terminals are disconnected, carefully remove the old lead-acid battery from the cart. If the battery is heavy, it might be helpful to have a second person assist.
Step 4: Prepare the Lithium Battery
Now it’s time to prepare your new Fleet Lithium Golf Cart Battery for installation. Fleet Lithium batteries are known for their lightweight design, making the installation process much easier than with traditional lead-acid batteries.
- Position the Battery: Place the new lithium battery in the same location as the old battery. Make sure the battery fits snugly and securely in the battery compartment.
- Check for Proper Alignment: Ensure that the battery’s terminals are positioned in such a way that the cables will connect easily to the positive and negative terminals.
Fleet Lithium batteries are designed to be simple to install, so you should not have to modify the battery compartment for a standard installation.
Step 5: Connect the New Lithium Battery
Once the lithium battery is positioned in place, you can proceed to connect the terminals:
- Connect the Positive Terminal: Start by connecting the positive terminal of the lithium battery to the positive lead of the golf cart. Tighten the connection securely using a socket wrench. Ensure there is no movement in the connection to prevent any issues during operation.
- Connect the Negative Terminal: After the positive terminal is connected, proceed to connect the negative terminal. Again, use the socket wrench to ensure the connection is tight and secure.
These connections are crucial for the safe and efficient operation of the battery, so make sure to double-check that each terminal is firmly attached.
Step 6: Test the Installation
After completing the physical installation of the lithium battery, it’s time to power up the golf cart and ensure everything is functioning properly:
- Turn on the Golf Cart: Switch on your golf cart to check if it powers up smoothly. If your cart has a display panel, check for any error messages or alerts.
- Test the Voltage: Use a voltage tester to confirm that the battery is delivering the correct voltage (e.g., 48V for a 48V system). This ensures that the new lithium battery is working as expected and supplying the necessary power to your golf cart.
- Check for Proper Functionality: Test out your golf cart by driving it around for a few minutes. Pay attention to how it feels — the power should be consistent, and the acceleration should be smooth.
If everything checks out, your installation is complete, and your golf cart is now ready to benefit from the many advantages of a lithium battery!
Conclusion
Upgrading to a Fleet Lithium Golf Cart Battery is one of the best investments you can make to enhance the performance and longevity of your golf cart. With the right battery, proper installation, and a few simple tools, you can experience the benefits of faster charging, longer lifespan, and reduced weight compared to traditional lead-acid batteries.
For more information and to find the perfect Fleet Lithium Golf Cart Battery for your needs, visit our Fleet Lithium Golf Cart Battery Collection.


