How to Install a Fleet Lithium 51V 105Ah Battery in an EZGO TXT Golf Cart
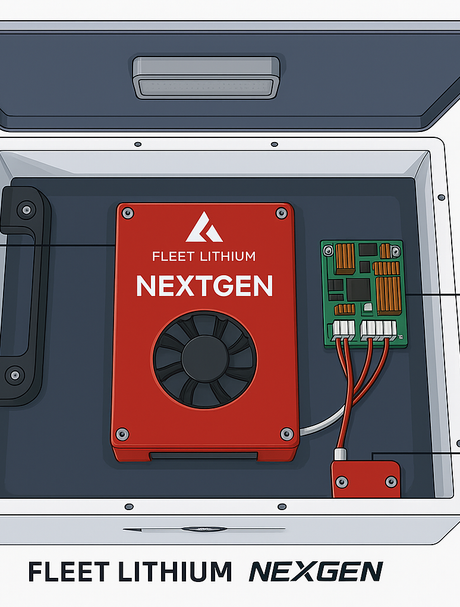
Upgrade your EZGO TXT golf cart with the Fleet Lithium 51V 105Ah battery featuring the advanced NexGen BMS. This guide provides detailed instructions for installation, including the use of our universal battery bracket, voltage reducer, and SOC meter.
Tools & Supplies Needed
- Socket wrench set (10mm, 13mm, 17mm)
- Torque wrench
- Drill with metal drill bits
- Step drill or 2" hole saw
- Wire cutters/strippers
- Heat shrink tubing or electrical tape
- Zip ties
- Multimeter
- Stainless steel bolts, washers, and nylock nuts
- Anti-seize compound and dielectric grease
Step 1: Safety First
- Turn off the key switch and set the tow/run switch to “TOW”.
- Disconnect the main positive and negative cables.
- Remove any securing brackets or straps.
- Lift out lead-acid batteries carefully.
- Clean the battery tray thoroughly.
Step 2: Install the Battery Tray Bracket
The EZGO TXT frame has a center spine that can interfere with a flat lithium install. Our universal battery bracket solves this problem.
- Take the optional (included with ezgo specific kit) Fleet Lithium battery tray mounting bracket and flip it upside down so the slotted side faces downward into the tray.
- Center the bracket across the tray spine and mark your drill holes using the bracket slots as a template.
- Drill through the bracket and tray carefully using a metal drill bit.
- Mount the bracket using stainless bolts, flat washers, and nylon locking nuts to prevent loosening over time.
- Torque bolts to 12 ft-lbs. Use anti-seize on threads and apply dielectric grease or corrosion spray to all hardware.
TIP: This bracket is designed to work across multiple platforms. In the TXT, mounting it upside-down allows your battery to sit flat and lock in securely.
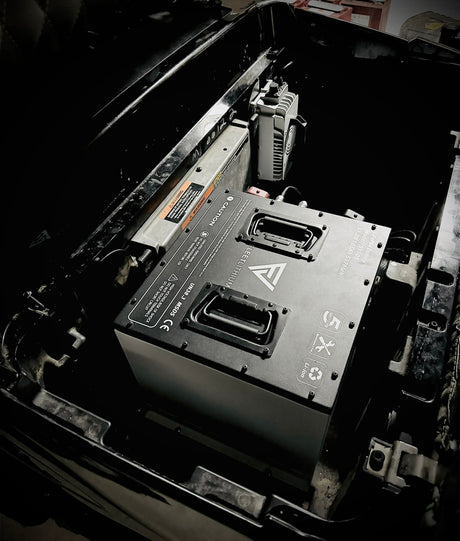
Step 3: Install the Fleet Lithium Battery
- Place the Fleet Lithium 51V 105Ah battery in the center of the tray.
- Align the mounting holes and secure the battery to the bracket using bolts provided or stainless M8 hardware.
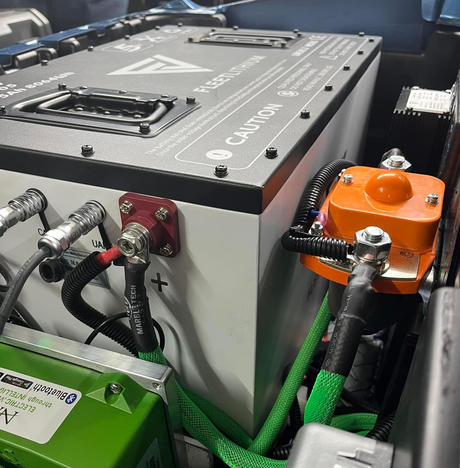
- Connect the pre-attached positive (RED) and negative (BLACK) leads to the main power lines of the golf cart.
Step 4: Install the Voltage Reducer
Most accessories (lights, radio, horn) require 12V — your lithium pack delivers 51V. The voltage reducer safely steps this down.
- Mount the Fleet Lithium 12 Volt DC Voltage Reducer to a metal frame or inside the battery bay (away from heat).
- Connect the 48V+ and 48V− leads directly to the battery terminals or the main power cables.
- Connect the 12V+ and 12V− to your cart’s accessory wiring harness.
- Use inline fuses and crimped ring terminals for best connection safety.
- The last wire is a key on wire for things like your headlights to turn on and off with the battery, You can wire this directly to your solenoid Make sure to take a multimeter and test for power with the key on and the key off.
Step 5: Install the SOC Meter
The included meter gives you a real-time readout of battery voltage and estimated state-of-charge.
- Use a 2" hole saw or step drill to create a hole in the dash or cup holder area.
- Push the Fleet Lithium SOC Gauge into the hole and tighten the rear nut until snug.
- Alternatively, use our optional 2" battery gauge bracket to easily mount your bracket anywhere with no holes.
- Run the wire from the gauge down to the battery and plug into the CANbus port.
Step 6: Connect the Charger
- Plug in the lithium-specific charger provided by Fleet Lithium.
- Do NOT use your old lead-acid charger.
- Mount charge port in factory location or drill a new flush-mount hole in the cart body.
- Verify charger clicks on and charges properly.
Step 7: Test System
- Flip Tow/Run to “RUN”.
- Turn on key switch.
- Verify power on dashboard.
- Forward/reverse switch engages motor.
- No warning lights or buzzers.
- Open the Fleet Lithium App:
- Verify voltage (~53V when fully charged)
- Check current output
- Internal temp (heater verification)
- BMS status: Active
Step 8: Final Checks
- Zip tie loose cables.
- Add insulation or protection around any friction points.
- Torque all terminal nuts to spec (12 ft-lbs recommended).
- Close seat compartment.
Step 9: Ride Test
- Light test ride under no load.
- Full throttle run on level ground.
- Check for overheating or cutoff.
Troubleshooting Tips
| Issue | Solution |
|---|---|
| Cart doesn’t power on | Check key switch, main cables, BMS app, fuses |
| Charger doesn’t activate | Ensure correct charger, fully seated connector |
| BMS shows imbalance | Drive a bit, then re-check app after charge cycle |
| Battery cuts out under load | Ensure motor controller is not drawing over 300A constant |
Need Help?
Contact our team at support@fleetlithium.com or use the Bluetooth app for live diagnostics and support ticket submission.
Fleet Lithium – Power You Can Trust.